Everyday Seasonal Cooking
How to Make Fresh Pasta with a KitchenAid: The Roller Settings I Actually Needed
The roller setting, the mixer speed and the cutter, kept apart: a calm guide to fresh pasta for two with a KitchenAid, including how the classic roller differs from the 3-in-1.
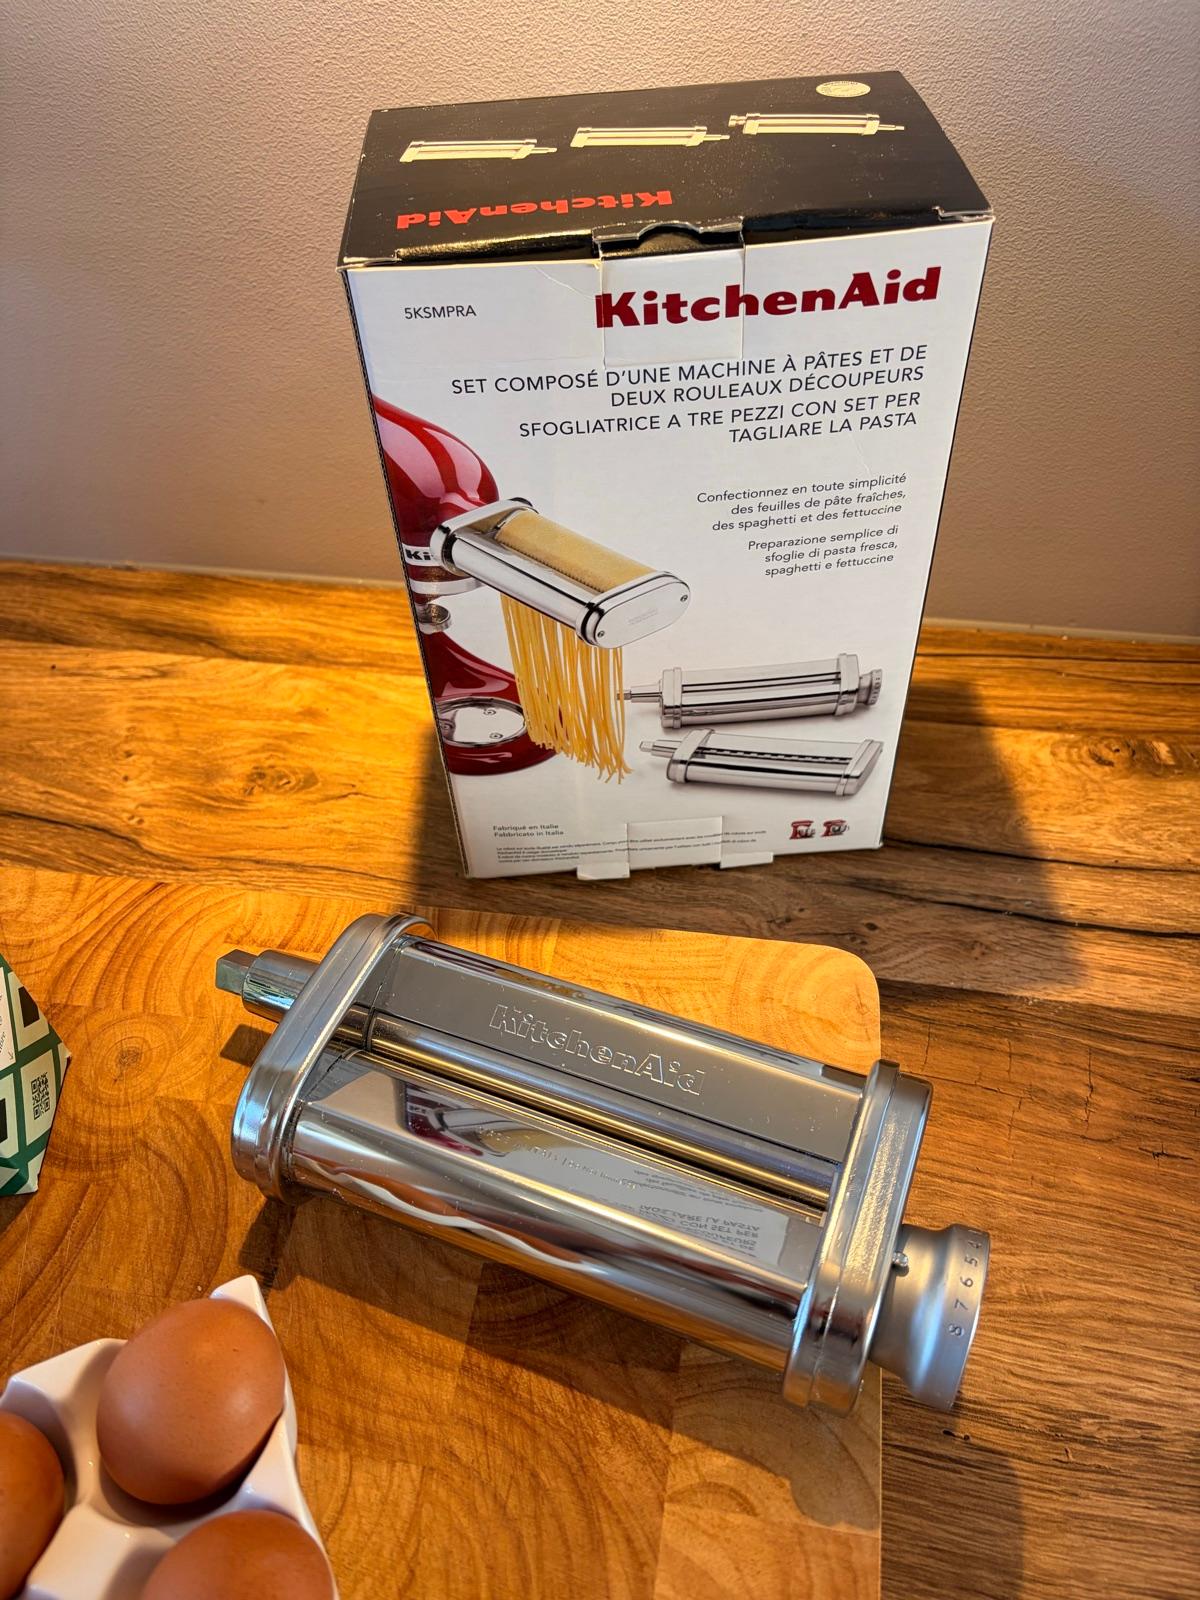
There is something satisfying about making fresh pasta at home. It is not an everyday undertaking, and I rather like that. You bring out the mixer, put a little flour on the worktop and turn a handful of very ordinary ingredients into something that feels special for dinner.
But there is one moment that decides whether it becomes a lovely kitchen ritual or you stand in front of an attachment wondering what to do next: which roller setting should I use?
It turns out you make two separate decisions. First, how thin should the dough sheet be? Second, which cutter turns that sheet into ribbons? Here is a clear starting point, with KitchenAid’s published guidance kept apart from the small choices you can make to suit your own dinner.
Quick answer
With the classic KitchenAid pasta sheet roller, start at the widest setting 1, fold and feed the dough through until smooth, then work gradually towards 4 or 5 for fettuccine or tagliatelle-style ribbons. KitchenAid lists mixer speed 2 for the classic roller and speed 5 for its separate fettuccine cutter. The newer 3-in-1 attachment is different: its rolling and cutting instructions specify speed 4. Check which attachment you own before following any settings guide.
Before you start: which KitchenAid pasta attachment do you have?
This sounds fussy, but it is probably the most useful part of the whole guide.
KitchenAid has sold more than one pasta-making accessory. A common traditional set contains a separate pasta sheet roller, fettuccine cutter and spaghetti cutter. You remove the roller and fit the cutter once your pasta sheets are ready.
The newer 3-in-1 pasta attachment combines those functions in one product, and its operating speeds differ from the classic separate-attachment instructions.
That is why a guide saying only “use speed 2”, or only “use speed 4”, can be misleading. Both can be correct, for different accessories.
KitchenAid pasta roller settings: the reference table
The dial on the roller sets the thickness of the sheet, not the width of the ribbon. A separate cutter decides the width. These figures follow KitchenAid’s published guidance for its classic roller and cutters; the 3-in-1 follows its own manual.
A small terminology note: KitchenAid sells a fettuccine cutter. Home cooks often call the result tagliatelle, but the exact width depends on the cutter, so there is no need to rename an official attachment to match the dish.
Classic roller: dial setting and mixer speed
| Classic sheet roller dial | Classic attachment speed | |
|---|---|---|
| Start, fold and smooth the dough | 1–2 | Roller: speed 2 |
| A thicker noodle sheet | 3 | Roller: speed 2 |
| Egg noodles | 4 | Roller: speed 2 |
| Fettuccine or tagliatelle-style ribbons | 4–5 | Roller: speed 2, then separate fettuccine cutter: speed 5 |
| Thin fettuccine or fine linguine | 6–7 | Roller: speed 2; check your cutter model |
| Very delicate, thin sheets | 7–8 | Roller: speed 2; check your cutter model |
A simple fresh egg pasta starting ratio for two
You can make fresh pasta with nothing more complicated than flour and eggs. For a small dinner, this traditional proportion is easy to remember:
- 200 g Italian 00 flour, or a suitable plain flour
- 2 large eggs
- A little extra flour for dusting
That serves about two, depending on appetite. It is a working starting ratio, not a promise that every dough will behave the same: flour absorbs moisture differently and egg sizes vary. It is also not a recipe I have tested and measured for this site, so treat it as a place to begin.
If the dough feels dusty and will not come together, it may need a little more moisture. If it is tacky and clings to everything, it may need more flour and a short rest. Adjust sparingly rather than rescuing it with a great handful of either.
Step 1: Make the dough
Place the flour on the worktop, make a well and add the eggs. Beat the eggs gently with a fork, drawing in the flour until a rough dough forms. Alternatively, use the mixing method recommended for your KitchenAid model and dough hook.
Once it comes together, knead until it feels smooth and cohesive. As a guideline that may take around 8 to 10 minutes by hand, but texture matters more than the clock. Pasta dough should feel firm and pliable, not like a wet bread dough.
If you knead with the stand mixer, follow its own dough guidance. The rolling speeds in this guide are not mixing or kneading speeds.
Step 2: Rest the dough
Wrap the dough well so it does not dry out, and let it rest for roughly 30 minutes before rolling. That gives the flour time to hydrate and makes the dough easier to stretch into a sheet.
Keep the dough you are not using covered while you roll. An uncovered piece dries at the edges while you work with the first.
I like doing this part before thinking about the sauce. It creates a natural break: make the dough, tidy the worktop, prepare the rest of dinner, then come back to the pasta.
Step 3: Divide and flatten
Divide the dough into four manageable pieces. Flatten one into a small oval or rectangle with your hands or a rolling pin, just enough to feed into the widest roller setting.
Fit the classic pasta roller securely with the mixer switched off and unplugged, and keep fingers, hair and loose sleeves away from the moving rollers. Your KitchenAid manual explains how to attach it safely for your model.
A slight dusting of flour helps. Too much gives a dry, dusty sheet; too little and the dough may stick.
Step 4: Start at setting 1 and fold
For the classic roller, set the thickness dial to 1 and run the mixer at speed 2, as KitchenAid instructs. Feed the flattened dough through.
Fold the sheet in half or into thirds and feed it through again. Repeat several times until it looks even and feels smooth. The repeated folding is what gives you a consistent sheet.
If the edges tear dramatically, the dough may be too dry or not rested enough. If it sticks to the metal, use a little flour and check it is not too wet. Do not force a thick, irregular lump into a narrow setting; the gradual process is the point.
Step 5: Move through the thickness settings
Once the folded sheet is smooth, run it through setting 2, then 3, then 4, one step at a time. For ribbons like fettuccine or tagliatelle, 4 or 5 is KitchenAid’s suggested range for its classic roller.
The sheet gets longer with every pass, so support it with your hand. If it becomes unwieldy, cut it in two before rolling further. From here you only thin the sheet; the folding is finished.
Setting 4 or 5? For a little more bite, begin with 4. For a more delicate ribbon, try 5. Cook a tiny test portion before deciding that one number should be your permanent answer.
Step 6: Cut the pasta into ribbons
With the classic separate attachments, switch off the mixer before removing the roller and fitting the fettuccine cutter. KitchenAid lists mixer speed 5 for that cutter.
Feed the finished sheets through carefully and let the ribbons fall onto a lightly floured worktop or tray. Nest them loosely if you like, but do not compress them into a sticky pile.
If you own the combined 3-in-1 attachment, do not carry the classic cutter speed over: follow the speed 4 directions for that model.
It also helps to separate two controls that are easy to confuse. The dial on the roller changes thickness. The lever on the mixer changes how quickly the mechanism turns.
Step 7: Cook fresh pasta
Bring a generous pan of water to the boil and salt it to your taste. Fresh egg pasta cooks much faster than dried; start checking after around 2 minutes, but treat that as a prompt rather than a rule. Thickness, flour, moisture, shape and whether the pasta has dried all make a difference.
Taste a strand. You want it cooked through, with the texture you like. Keep a little starchy cooking water back before draining if your sauce would benefit from loosening.
When the pasta has taken time to make, I like to keep the sauce uncomplicated: a good tomato sauce, olive oil and herbs, or a mushroom sauce that suits your diet.
Pasta made from flour and eggs contains no milk, but always check the flour, any additions, the sauce and packaged products if you are avoiding dairy or other allergens.
Why does my fresh pasta keep sticking or tearing?
Fresh pasta is forgiving once you learn to read the dough. Most problems are small texture issues rather than a sign you need different equipment.
Do not use metal implements inside a running attachment. If anything jams, switch the machine off and unplug it before checking the manufacturer’s instructions.
Common problems and what to try
| Likely cause | What to try | |
|---|---|---|
| Dough sticks to the roller | Too wet or not dusted enough | A little flour and a brief rest |
| Sheet cracks at the edges | Too dry or not rested enough | Cover and rest; adjust moisture carefully if needed |
| Pasta sheet looks uneven | Started with an irregular piece | Flatten first and repeat the early folding passes |
| Ribbons clump together | Sheets too damp or stacked | Dust lightly, separate and cook promptly |
| Dough tears at a narrow setting | Skipped too many settings | Go back to a wider setting and thin gradually |
| Pasta tastes too soft | Rolled very thin or overcooked | Test a slightly thicker sheet; taste sooner |
Do you need to dry homemade pasta before cooking?
No. Fresh pasta can go straight into boiling water, which is part of its charm.
If you want to make pasta ahead, safe storage matters more than pretty nests for a photograph. Fresh egg pasta is perishable: keep it refrigerated for short-term use and use a suitable freezer method for longer storage, rather than leaving moist egg pasta at room temperature for long. I am deliberately not giving fixed storage times here; follow reputable food-safety guidance for your ingredients and conditions.
How to clean the KitchenAid pasta roller
The classic stainless-steel pasta roller and cutters are not dishwasher-safe and should not be immersed in water. KitchenAid advises letting leftover dough dry, then brushing it away with the supplied cleaning brush and wiping the attachment with a soft dry cloth.
Use the current care guide for your exact model, and never poke fingers or sharp objects into moving rollers or rinse an electrical attachment under the tap.
This is perhaps the least romantic part of making pasta, but it means the attachment is ready next time instead of becoming one of those gadgets you avoid because cleaning it is dreadful.
Is a KitchenAid pasta roller worth it for two people?
That depends far more on how you cook than on how many are at the table. If you love making things from scratch on a Sunday afternoon, enjoy a small kitchen ritual and already own a KitchenAid, a roller makes the repeated rolling and thinning more consistent than doing it all by hand.
If your weeknight aim is dinner on the table with the least washing-up, dried pasta is a wonderful thing too. There is no virtue in making every meal more complicated. For me the appeal is choosing when dinner becomes a little project and when it stays gloriously easy. I mention the attachment in 10 bougie things worth the money, where I explain why it is on my list.
The Essy’s verdict
The best part of homemade pasta is not an immaculate photograph of flour falling through the air. It is the moment the dough stops looking like an unpromising lump and starts coming out of the roller as a smooth sheet.
For a classic KitchenAid set, remember: 1 to begin, 4 to 5 for ribbons, mixer speed 2 for rolling and speed 5 for the separate fettuccine cutter. The combined 3-in-1 is different. Beyond that, watch the dough, allow enough time and make dinner something you enjoy cooking.
The loveliest kitchen rituals are the ones you want to repeat.
Pair It With
Frequently asked questions about KitchenAid pasta
What setting should I use for tagliatelle on a KitchenAid pasta roller?
For the classic KitchenAid sheet roller, start at setting 1 and roll gradually towards 4 or 5 for fettuccine or tagliatelle-style ribbons. The separate fettuccine cutter determines the ribbon width. Check your attachment model before using these settings.
What speed should a KitchenAid pasta roller be on?
KitchenAid specifies speed 2 for its classic separate pasta roller. Its newer 3-in-1 attachment uses speed 4 for both rolling and cutting. Follow the manual that came with your attachment.
What speed should the KitchenAid fettuccine cutter be on?
The classic separate KitchenAid fettuccine cutter is listed at mixer speed 5, which is different from the speed of the classic sheet roller.
Should I use setting 4 or 5 for fresh pasta?
Both fall within KitchenAid’s suggested range for fettuccine-style sheets. Setting 4 gives a slightly thicker result and setting 5 a thinner one. Cook a test strand to learn which texture you prefer.
Do I have to fold the dough every time it goes through the roller?
No. Fold during the first passes at the widest setting to make the sheet smooth. Once it is even, pass it through progressively thinner settings without folding again.
Can I make fresh pasta without 00 flour?
Yes. A suitable plain flour can work, although the texture and moisture needs may differ. Start with a modest quantity and adjust the dough by feel.
How long does homemade fresh pasta take to cook?
Fresh pasta often cooks in a few minutes. Start tasting after roughly two minutes and judge by thickness and texture rather than relying on one universal time.
Can I wash a KitchenAid pasta roller in the dishwasher?
No, not the classic metal roller and cutter set. Follow KitchenAid’s model-specific cleaning directions and do not immerse the attachments.
Editorial note
This guide combines my own experience making pasta with a KitchenAid and the model-specific instructions KitchenAid publishes. The small-batch flour-and-egg ratio is a conventional starting point, not a recipe I have tested and measured for this site. No sponsorship or equipment endorsement is implied, and there are no affiliate links on this page.
Official KitchenAid references
- KitchenAid UK — Pasta makers: classic roller and cutter guidance
- KitchenAid — Settings and speeds for the 3-in-1 pasta attachment
- KitchenAid — Pasta cutter and roller: speeds and care

Written by Esther
Esther is a photographer and storyteller, and the founder of Essy's Essentials - a seasonal home for stories, rituals, recipes and everyday luxuries.
More about Esther →